Window coverings do much more than enhance aesthetics – they play a vital role in controlling light, maintaining privacy, improving insulation, and boosting energy efficiency. Choosing the right window treatment can elevate comfort while seamlessly integrating with your home’s interior.
Even though Singapore only has one seasonal weather, selecting suitable curtains or blinds that match the heat and humidity requires careful consideration of both function and style.
This guide will explore various types of curtains and blinds, their advantages, installation methods, and essential factors to help you make an informed decision.
1. Curtains vs Blinds: What’s the Difference?
Curtains and blinds serve different purposes, each offering distinct advantages based on your lighting needs, maintenance preferences, and décor style. While curtains add softness and insulation, making them ideal for a cosy, elegant atmosphere, blinds provide a streamlined, modern aesthetic with precise light control.
How to Decide Between Curtains & Blinds
When choosing between curtains and blinds, consider factors such as material, light control, privacy, and maintenance.
Best of Both Worlds?
If you want the benefits of both, layering curtains over blinds provides adjustable light control, improved insulation, and a sophisticated look. This combination works especially well in bedrooms and living areas where flexibility is key.
2. Understanding the Different Types of Curtains
Curtains are a timeless and versatile window treatment that can set the tone for a room. Whether you prefer soft, diffused light or complete darkness, selecting the right type of curtain can greatly impact the ambiance and functionality of your space.
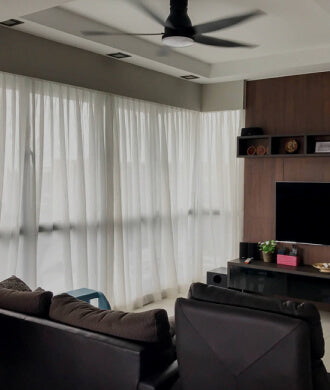
Day Curtains – Soft Light Filtering
Best for: Living rooms, home offices, dining areas.
Day curtains are made of sheer, lightweight fabrics that allow natural light to pass through while providing some level of privacy during the day. They create a bright and airy atmosphere, reducing glare without completely blocking the outside view. These curtains are commonly used in spaces where a relaxed, well-lit setting is preferred.
Pros: Enhances daylight while reducing harsh glare, maintains an open and inviting feel.
Cons: Offers minimal privacy at night unless layered with heavier curtains or blinds.
Material Choices: Sheer polyester, linen, voile, cotton blends.
Night Curtains – Full Privacy & Blackout
Best for: Bedrooms, media rooms, and nurseries.
Night curtains are made from heavier, opaque materials that block out external light and provide maximum privacy. They also help with insulation by retaining heat during winter and keeping rooms cool in summer. Blackout curtains are especially useful for individuals who work night shifts and need complete darkness to sleep during the day.
Pros: Provides total darkness for better sleep, improves insulation and soundproofing.
Cons: Heavy fabrics may feel overwhelming in small spaces unless balanced with lighter decor.
Material Choices: Velvet, blackout fabric, thermal-lined curtains.
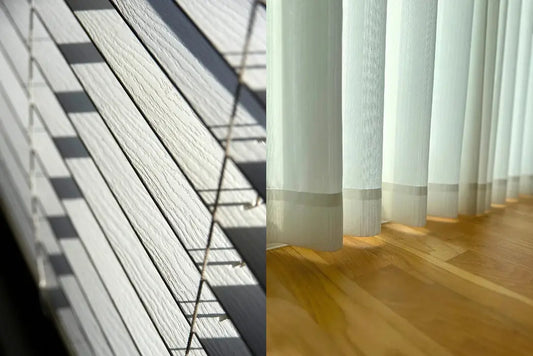
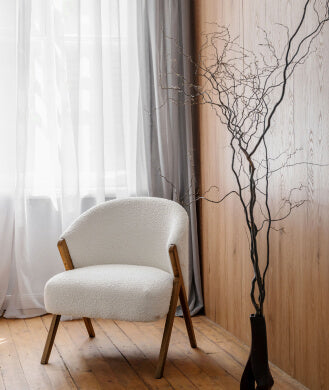
Layering Curtains for Style & Functionality
Layering curtains can enhance both light control and aesthetics. Combining sheer day curtains with heavier night curtains allows flexibility – you can filter natural light during the day and ensure complete privacy at night. To create a cohesive look, choose complementary textures and colours that match your interior design style.
3. Exploring the Different Types of Blinds
Blinds provide a contemporary, space-saving alternative to curtains. They offer a sleek, functional design with enhanced privacy and light control. Depending on the material and type, blinds can also provide insulation and UV protection.
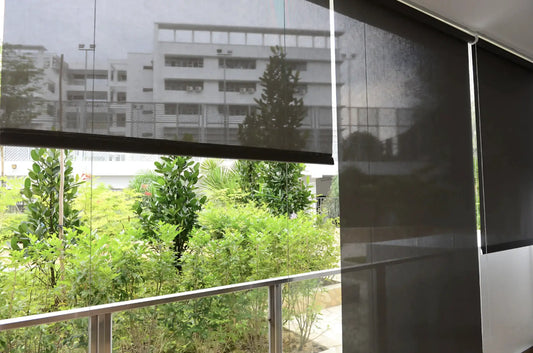
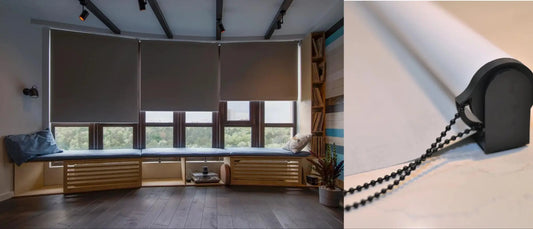
Roller Blinds: Sleek & Practical
Best for: Modern homes, kitchens, bathrooms.
Roller blinds are a simple yet stylish option that can be easily rolled up or down to control light and privacy. Available in a variety of materials, including blackout and moisture-resistant fabrics, they are an excellent choice for humid environments like kitchens and bathrooms.
Pros: Compact, easy to use, and available in motorised options.
Cons: Limited flexibility compared to Venetian or vertical blinds, as they only roll up or down.
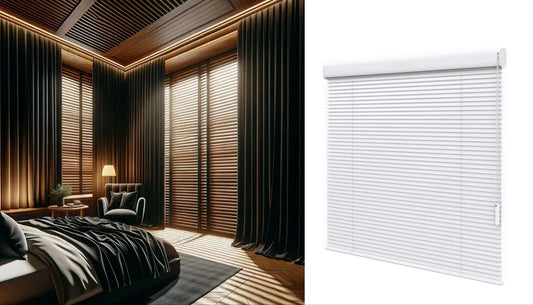
Venetian Blinds: Classic & Adjustable
Best for: Bedrooms, home offices, kitchens.
Venetian blinds feature horizontal slats that can be tilted to adjust light levels while maintaining privacy. They come in various materials, including wood, metal, and PVC, allowing homeowners to match them with different decor styles.
Pros: Adjustable slats offer precise light control and ventilation.
Cons: Dust can accumulate on slats, requiring regular cleaning.
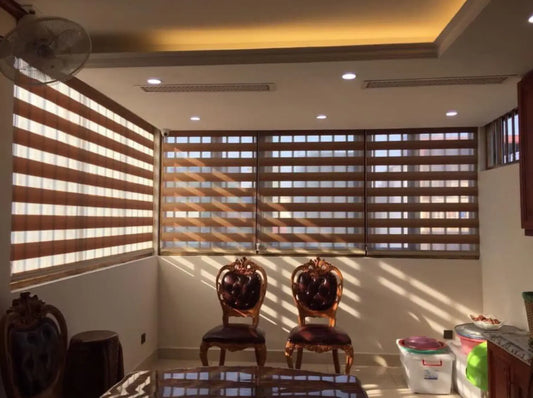
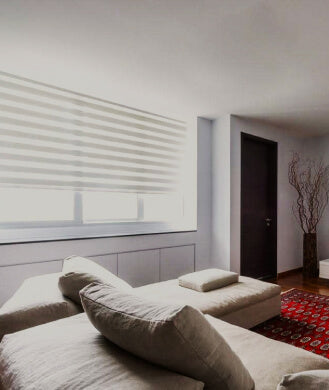
Korean Blinds (Combi Blinds): Stylish & Functional
Best for: Contemporary interiors, workspaces.
Korean blinds (combi blinds) feature alternating sheer and opaque layers, allowing you to control privacy and light filtration with a simple adjustment. These blinds add a contemporary touch to interiors and provide a versatile solution for different lighting needs.
Pros: Provides a stylish, modern look with adjustable opacity.
Cons: Less insulation compared to thick fabric curtains.
Roman Blinds: Elegant & Structured
Best for: Period homes, luxury interiors.
Roman blinds are fabric-based and fold neatly when raised, creating a tailored, pleated appearance. They add a sophisticated and polished look to interiors and come in a variety of colours, textures, and patterns to suit different décor styles.
Pros: Adds sophistication with soft fabric folds and thermal insulation.
Cons: Requires maintenance to keep fabric crisp and clean.
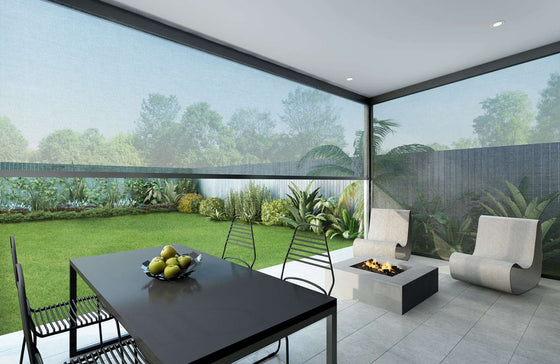
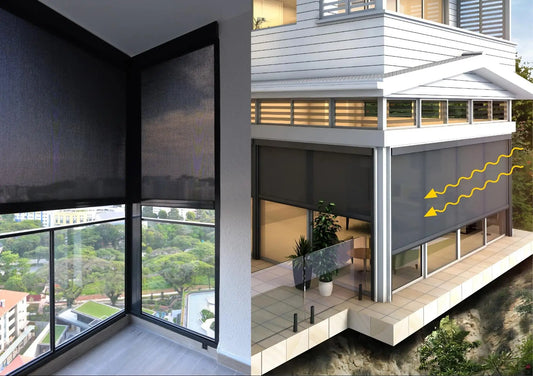
ZipScreen Outdoor Blinds: Protection from the Elements
Best for: Conservatories, patios, garden rooms.
ZipScreen blinds are designed to withstand outdoor conditions, making them perfect for spaces that need protection from wind, rain, and UV rays. These blinds are ideal for extending the usability of patios and garden rooms, allowing homeowners to enjoy their outdoor spaces all year round.
Pros: Provides UV protection, wind resistance, and comes in motorised options.
Cons: Higher initial investment, but offers long-term benefits.
4. Choosing the Right Fabric & Material
Choosing the right material for your curtains or blinds affects not only the visual appeal of your space but also its practicality. Some materials offer better insulation, while others are easier to maintain or more resistant to moisture and fading.
Best Materials for Curtains
-
Cotton & Linen: Lightweight, breathable, and suitable for casual spaces. They provide a natural look and drape well, although they may require ironing to maintain a neat appearance.
- Velvet: Dense, luxurious, and excellent for insulation. Ideal for cold climates and formal settings, velvet curtains add sophistication but require proper care.
- Polyester: Affordable, durable, and easy to maintain. Polyester curtains resist wrinkles and fading, making them a practical option for most rooms.
Best Materials for Blinds
-
Wood: Elegant and traditional, wooden blinds add warmth to interiors but require regular upkeep to prevent warping.
-
Metal & Aluminium: Modern, sleek, and durable. These blinds are resistant to moisture, making them ideal for kitchens and bathrooms.
-
Fabric Blinds: Soft and stylish but require more maintenance. They are available in a variety of colours and textures, adding a decorative element to the room.
5. Installation: DIY vs. Professional
Proper installation ensures that your window coverings function effectively and look aesthetically pleasing. Choosing between DIY installation and professional fitting depends on the complexity of the installation, your budget, and your skill level.
DIY Installation
DIY installation is ideal for those looking to save money and tackle simple projects such as mounting roller blinds or curtain rods. With a drill, measuring tape, brackets, and a bit of patience, most homeowners can install these window treatments without much difficulty. DIY installation allows for customisation and flexibility, but accuracy is crucial incorrect measurements can lead to improper fitting, reducing functionality and aesthetic appeal.
Professional Installation
For more complex window treatments, such as motorised blinds, custom-fitted curtains, or bay window coverings, professional installation is recommended. Professionals ensure precise measurements, secure mounting, and a flawless finish, particularly for heavier or automated systems. While professional fitting adds to the cost, it guarantees a polished look and long-term durability, minimising potential issues down the line.
6. Energy Efficiency & Eco-Friendly Choices
Window treatments play a crucial role in maintaining indoor temperatures, reducing energy costs, and supporting sustainability efforts.
Thermal Curtains & Blinds
These options help to insulate homes, preventing heat loss in winter and reducing heat gain in summer. By improving insulation, thermal treatments lower reliance on heating and cooling systems, resulting in reduced energy consumption.
Sustainable Materials
Opting for eco-friendly materials such as bamboo blinds and recycled fabric curtains minimises environmental impact. These materials are biodegradable, renewable, and produced with lower carbon footprints.
Solar-Powered Motorised Blinds
Advanced technology allows blinds to be powered by solar energy, automating their opening and closing based on sunlight exposure. This innovation enhances energy efficiency while reducing dependency on electricity.
The Right Window Covering Makes All the Difference
Choosing the right curtains or blinds is more than just an aesthetic decision it influences the comfort, privacy, and energy efficiency of your home. Understanding the benefits of different materials, installation methods, and energy-efficient options ensures that you make an informed choice tailored to your space.
Whether you prefer the timeless elegance of curtains, the sleek functionality of blinds, or a combination of both, your window treatments should align with your lifestyle and design preferences. Investing in high-quality coverings enhances not only the visual appeal of your home but also its efficiency and overall livability.